This example is built on scott Emp/Dept tables in which it gets the list of employees working in specific department using single selection list.
So, after creating the required application using JDeveloper 11g, I created an ADF business components from tables attached to scott schema. When using the wizard it should create EMP and DEPT entities, views and a view link describing the constraints the exists between the dept_id in EMP table and dept_id in DEPT table.
The model should look somthing like the following figure, the view FKDeptnolink construct the relation between the two tables. Modify the DeptView and set OrderBy clause to order values by Dept_no, this will help to get Dept_no filed that correspond to Dept_name filed from the iterator that will be defined later in next steps.
then, create a view page in the view controller, this page will contain our list of values.
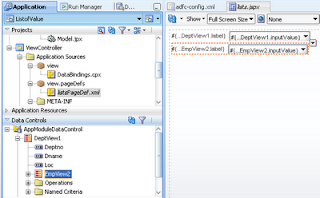
From data control drag the DeptView1 component and drop it on the page, select ADF Select One Choice component.
In the Edit List Binding, the Display Attribute select Department Name, and click ok.
then, expand the DeptView1 controller in Data Controls and drag EmpView2 control and drop it on the page as in the previous step. note (select the EmpView under the DeptView, don't select the one that on the same level).
Now, we need to set the refresh condition in which when ever the top list (Dept list) changed, the dependent one (Emp list) should be refreshed to get the records related to the selected value in Dept list. To do this, first you have to change the Auto Submit property for the Dept list and set it to true.
In the Emp list, set the partial page trigger to the id of the Dept list.
Now, you can test the page and it should work fine.
The next step is how to get the Dept_no primary key that corresponds to the department name from the binding table. To accomplish this, you need to create a tree iterator in the page definition binded to DeptView, right click on the page and select go to page definition, under the bindings area click add and select tree item to be created.
click OK, then in create tree binding select DeptView1 as root data source, in Tree level Rules click add, then in Display Attributes make sure that Deptno is selected and click OK.
At this point we created an iterator that will be used to get the Deptno field, the order in the list and in the iterator is the same since its force the Order By clause added at DeptView earlier.
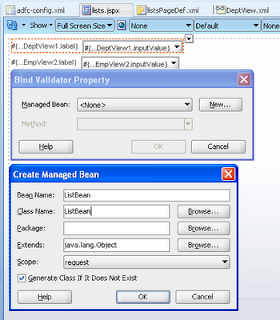
Now, we have to create a managed bean that will be used to show the selected value from the list and its corresponded value, in our case department name and department number. To add the bean. double click on the Department list when prompted select new managed bean if there is any, enter the name of the bean and name of the class, as shown below:
click Ok and the click OK for bind validator property. The validator property function will not be used, its only for fast process creation of managed bean, you can create the managed bean and attach it to your work flow in usual way as well.
On the page select the Bind property for the Department list navigate to advanced property and set the Bind value to the managed bean. Under property select new, enter a name for the binding then click OK.
Then set the Value Change listener as well:
Go to the ListBean Created, under ListChanged method write the following code:
int SelectedIndex=Integer.parseInt(dept.getValue().toString());
List list=dept.getChildren();
UISelectItems item1=(UISelectItems)list.get(0);
List list2=(List)item1.getValue();
SelectItem item2=(SelectItem)list2.get(SelectedIndex);
System.out.println(item2.getLabel());
BindingContainer bindings1 =
BindingContext.getCurrent().getCurrentBindingsEntry();
// Get the specific tree binding
//id of the binding from page definition
JUCtrlHierBinding brandCode =
(JUCtrlHierBinding)bindings1.get("DeptView11");
List l=brandCode.getChildren();
System.out.println(l.get(SelectedIndex));
This should print the label value as well as the corresponded number value that can be used later of database insertion or manipulation.


Nice example...!
ReplyDeleteVery Nice Example
ReplyDeleteThanks
Web development services
it so nice .. thank you so much...
ReplyDeleteWebsite Developer Melbourne